Tom’s Marketing Tales: Client product photography dissected and explained
Hello there! Welcome back to Tom’s Marketing Tales! In this edition, I have been tasked to take a product of my choosing and put it through the entire photography process that Amplitude has put in place for its clients. This will not only serve me well in my apprenticeship qualification, but it will also help me to learn the intricacies of the whole process so that I can be of more service if assistance is needed in future photoshoots!
Along with this, it will also act as a great introduction into the world of photography, which is a subject I haven’t had the opportunity to touch upon in the past. Also, as the Digital Marketing Apprentice at Amplitude, it will also be important to work out and discuss how I (and future clients) can use the finished product in a Digital Marketing context!
Without further ado, let’s embark on this intricate journey!
Choosing The Perfect Product
The first objective was to get myself a product to take through the whole process. Of course, clients are the ones that provide us the products when we do this for them, but this is a special occasion. Initially, I was struggling to find a product lying around in the office that matched my rigorous standards, so I took myself down to a local vintage shop to find something that I deemed worthy.
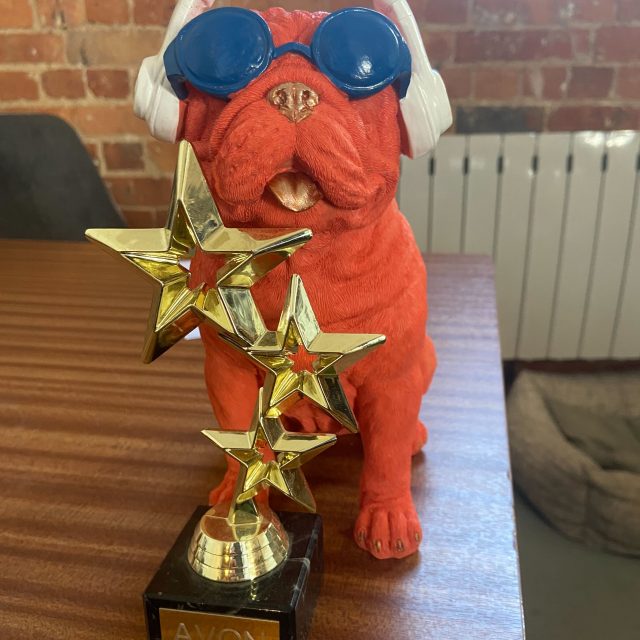
There are a number of genuine reasons as to why I picked JJ other than how dapper he is. Firstly, his multitude of colours makes the colour correction stage more interesting and challenging (meaning I’ll learn more from it.) Along with this, the amount of small details in his body makes for a more interesting photoshoot phase. Dogs are also a part of our company culture, and it’s important to stay on brand for this one!
Second task on the agenda was to conduct a bit of research on what I’m trying to accomplish. This firstly meant that I had to learn more about the different types of product photography. Thankfully, the Amplitude website already has a few blogs on this topic(check one out here! https://thisisamplitude.co.uk/model-and-ecommerce-development/ ) So after a quick read about all the different types of photography, I immediately knew how I wanted to photograph JJ.
I decided that standard product photography and still life photography were the best approach to this creative task. This is mainly due to JJ’s inanimate nature, but also because he was originally intended to act as a garden ornament of some kind. Because of this, a still life shot would be more relevant to any hypothetical customers as they would have a chance to view him in his natural environment.
Beginning The Journey
In order to begin the journey, I started off with standard product photography (which is a product shot on a plain background that you may find on a website.) For most of our client photoshoots, a small amount of prepping is needed depending on the nature of the product (e.g. clothing or jewellery.) Thankfully, JJ didn’t require any prepping so it was straight into the spotlight for him!
The next step was to set up the background, lights and camera for the shoot. Fortunately for me (and the Amplitude bank account) the professionals were on hand to help me set up the incredibly expensive and high-tech equipment. You know, to make sure I didn’t fatally damage anything. With the lights and camera properly set up, I was able to get to work by photographing JJ’s magnificence!
The process for me was trial and error, it would often take around 5 shots for each angle before I had one that I was satisfied with. To give an example, the sight of a harsh shadow would mean I had to respond by attempting to bounce the flash of the light off a carefully placed reflective screen. Along with this, I wanted to take angled, straight ahead and overhead shots of JJ so that I cover the most important parts of standard product photography.
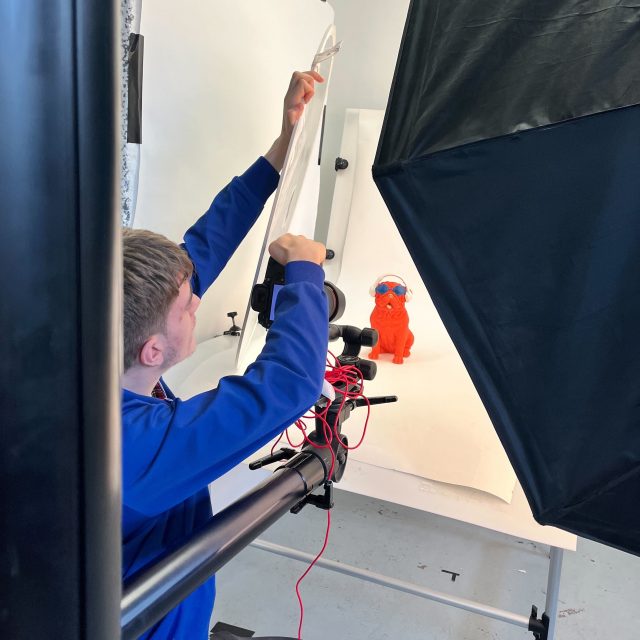
Fortunately for me, standard product photography is a relatively simple process (as far as photography goes) and I had some experienced professionals on hand to check over my results and to help me whenever I needed it. The real challenge was yet to come, as still life photography was next on the list.
Still Life Photography
At the time, I had absolutely no idea where to start. After seeking help from my colleague Emma, she came up with a ground-breaking strategy on the spot: Google it!
Truthfully, it was a little more complicated than that. I wasn’t exactly sure what to do in terms of setting, and Emma suggested that I research some examples of still life dog statues and compile them to see if I can spot any trends. Typically when we’re not sure how to photograph a product for a client, we refer back to an example shot that we’ve done in the past. However, because we haven’t conducted product photography on dog statues in the past (and the only client was, well, me,) it was up to market research to guide me on this one.
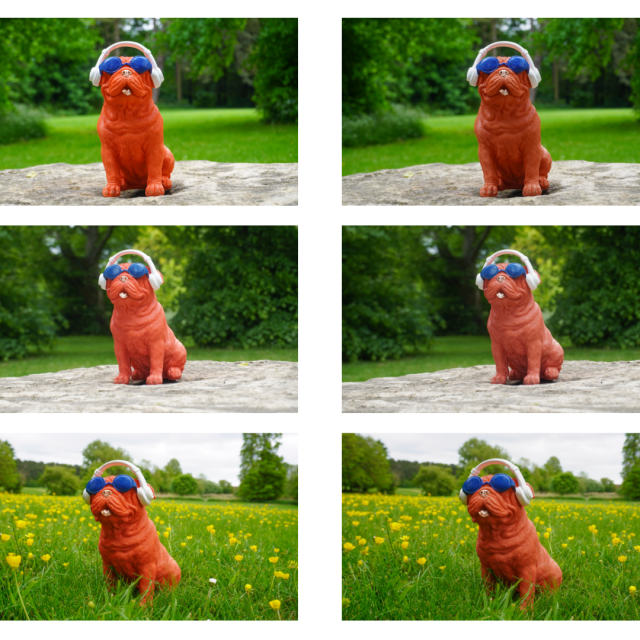
As it turns out, there was a trend in the images I collected. Most of the statues were glorified on a well placed rock or a pedestal. This was a brilliant finding as I live next to a park which had a statue stolen from it a while ago, leaving nothing but the pedestal behind. Along with this, it would be ideal to get some majestic shots of JJ among the flowers.
So the plan was set in stone, and the kind folks here at Amplitude were nice enough to entrust me with a camera to take with me. All that was left now was to take everything that I’ve learned from my Colleagues into the field (no pun intended!) This would mean that I would be without any assistance (even though help was only a phone call away in reality.)
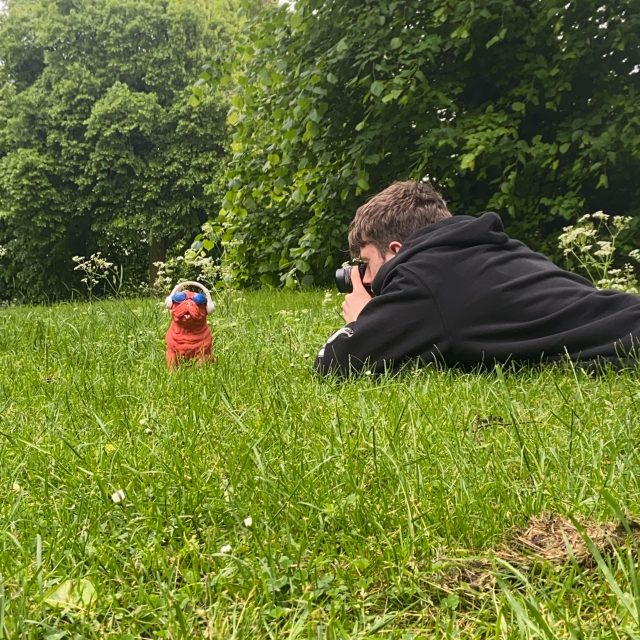
Upon placing JJ on the pedestal, I decided to get as many angles as I could. Seeing that no professionals were present to check over my photos, I adopted a “the more the merrier” mindset. My secret advantage was the fact that I was not running on a deadline, which is a blessing that client photography projects do not have. Because of this, I wanted to cap myself at most an hour or two in order to keep it as realistic as possible.
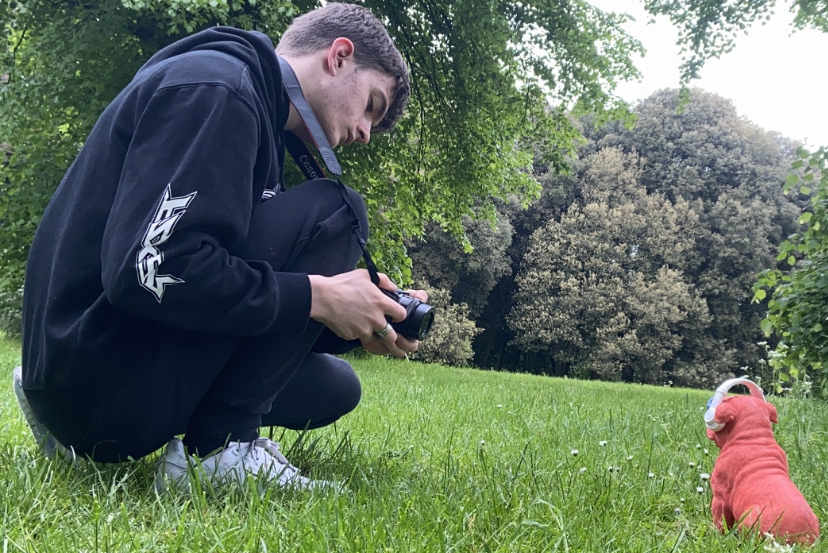
As I gathered as many shots of JJ on the pedestal as possible, I then decided to move him into the field to get some shots of him among the spring flowers (for the ‘gram of course!) I also made sure to capitalise on the occasion and get some behind the scenes shots for the Amplitude instagram account.
My still life photography was now complete. And with the photos being given the stamp of approval by my colleagues, I was ready for the next phase. The most tricky part was still yet to come however, as the time had now come to process all the images through Adobe Lightroom and Photoshop.
Processing and Refining
For this stage, I had to yet again enlist the help of my trusted colleagues. This was mainly due to the fact that I am not yet too familiar with this process, as the intricacy of it means that the task typically falls into the hands of the more experienced team members. That being said, they were more than happy to help me out to prepare me for future projects!
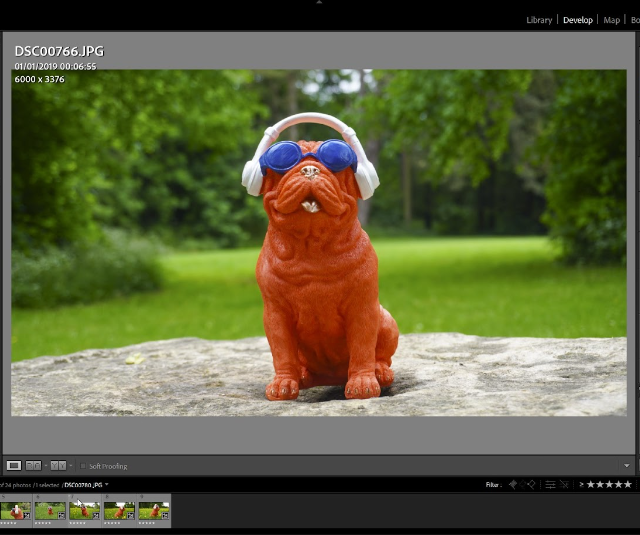
Step one was to back up the images onto a computer for safety and ease of access. This was as simple as dragging and dropping the files, so it was easy enough for me! Step two was to process all the images through Adobe Lightroom. This means checking through all the images and making slight adjustments on things like temperature, tint, exposure, contrast or shadows in order to bring the best quality out of the raw image.
This process can be streamlined by including the same product in the same light in each Lightroom session. This way, when we are editing our photos the process can be completed quicker by referring to images we have already tweaked of the same product in similar lighting. This not only ensures consistency but also is beneficial when it comes to time management.
After all of that tweaking was done, the time had come to pick out the best photos I had taken. As part of the Amplitude processes, I was advised to pick out images that brought out the best in the product (which includes detail, lighting and setting in this case.) This led to me giving eight images the “five star” label on Lightroom, and after I saved them to the relevant folder, the time had come to colour check the images I had filtered out.
Colour Matching
As incredible as our camera equipment is when it comes to capturing the fine detail of products, it can be slightly off when it comes to colour. This is common with any camera and even though the difference in colour is negligible, our rigorous standards for quality will not allow for this difference to slip through. Not only that, but clients can also spot these small changes in the colour of their products, which adds extra incentive for us to get it absolutely perfect. Furthermore, it is also important that customers receive products that are the same colour as the product they’ve seen online.
Although the methods can differ, for JJ the bulk of the colour correction phase was done in Photoshop. This was done by having JJ there with me so I could judge the difference in colour between the images and the actual product with my own eyes. This process is commonly done in a dark room with neutral lighting to ensure accuracy. The main difference I noticed was in his orange coating, as I thought it was a bit too bright.
The process for actually correcting the colour can get a bit complicated and requires at least a basic understanding of Photoshop in order to fully grasp, so I will try and keep it simple. Basically, it required me to create a new layer for the colour changes; I will refer to this layer as the “colour correction” layer. The colour correction layer has many ways of changing the lighting, shadows or colour (for this explanation, I will be focusing on colour.) The colour correction layer also allows me to target a specific primary colour from the image, such as “reds” or “blues.”
In order to make changes to JJ’s orange coating, I selected the “reds” option. This also allows me to avoid changing the colour settings of anything else in the image, and nothing else in the image would fall under the “reds” category so that made it simpler. From there, I was able to change the brightness of the coating, which allowed me to make the changes I thought were necessary in this case.
Wow, that was a lot and was way oversimplified, I hope you’re still with me!
Thankfully, I was able to copy this layer to the rest of the images, similar to what I did back in Lightroom. However, my job wasn’t quite finished, as now I needed to “spot check” the images one by one. Spot checking is the process of checking for impurities within the image (this ranges from small gaps in paint or things that might draw the viewer’s attention away from the product.) This step also requires a new blank layer to be created over the image simply labelled “corrections.” I was told that it was important to never change the base image, for fear of making any irreversible mistakes.
There are a few tools in Photoshop that can assist in this step, such as the “Clone Stamp” tool or the “Spot Healing Brush”. When it came to the photos of JJ among the flowers, there were a few close up flowers that I thought could draw eyes away from the star of the show, so I used the Spot Healing Brush to seamlessly remove them. Also, when it came to spot checking JJ, there were a few small chips in his paint coating that I thought could be removed (in this case, either the Spot Healing Brush or the Clone Stamp tool will work, depending on the size of the impurity.)
After going through all the images and making slight tweaks in each one, a peer review was in order. This didn’t set me back though, as all the images were given the stamp of approval. I feel it’s important to note that client projects require a deeper peer review that includes going through 3 separate rounds of checking, and it was simpler in this case because of the context of the project (being a personal assignment for my benefit.)
A Thousand Uses
Next on the agenda is to discuss how these images can be used in a digital marketing context. As previously discussed, photography projects like this typically result in the clients using them for their online stores or websites. However, quality images like these can have a multitude of different uses. For example, I can use Photoshop to edit the images so they fit social media dimensions. High quality images can also be repurposed and cut down to be used in animation projects.
Upon realising this, I created an Instagram account for Jasper Jasper in order to put these images to good use. When discussing Instagram, post dimensions are typically a 1:1 aspect ratio (or 1080px by 1080px.) However, these dimensions can change for reels and stories (1080px by 1920px.) These images can be used for any social media however, such as Facebook, LinkedIn or Twitter.
Along with this, I can use the basic white-background shots to craft a banner for any social media platform or website using Photoshop or Canva. The benefit of using high quality images for any digital marketing context is that audiences are typically drawn more towards images that are high quality, and appreciation for quality photography would often be shown by liking the post. A reaction like this is good for engagement, which is a universally loved trait by all social media algorithms.
When it comes to usage for websites or online stores, it’s a no-brainer that any potential customers will respect a retailer more if small details are considered for their product photography, which serves well for the overall audience opinion of the business. Not only that but a high quality image typically implies a high quality product. A strong opinion of a business is great for converting customers into advocates for your brand.


